Redmine Automations
The Automations plugin extends Redmine with advanced automation and integration capabilities, empowering users to define and execute custom workflows triggered by a comprehensive range of Redmine events. The plugin enables both administrators and project managers to streamline routine tasks, enforce business rules, and minimize manual intervention—significantly improving efficiency, accuracy, and consistency across projects.
In addition to automating internal Redmine operations, the plugin enhances Redmine’s integration capabilities by providing a dedicated “Send web request” action. This feature enables automatic, condition-based communication with external third-party systems (such as ticketing, CRM, or notification platforms), thereby supporting seamless interoperability and advanced process automation beyond Redmine itself.
Furthermore, Automations extends Redmine’s notification features. The configurable “Send email” action allows users to define targeted, automated email notifications based on complex conditions, ensuring the right stakeholders are informed at precisely the right time.
Key Features:
- Automated responses to issue and time entry events.
- Project-level and global automations.
- Broad set of triggers and actions, including notifications and external integrations.
- Fine-grained conditions and branching for complex workflows.
- Comprehensive logging and execution traceability.
- Enhanced integration with external systems via web requests.
- Advanced, condition-based notification management through configurable email actions.
1. Installation
1.1. Download and Purchase
The Automations plugin can be obtained from redmineplus.com
1.2. Installation Steps
- Download the plugin package from the vendor website.
- For detailed installation guidance and troubleshooting, see the official installation guide.
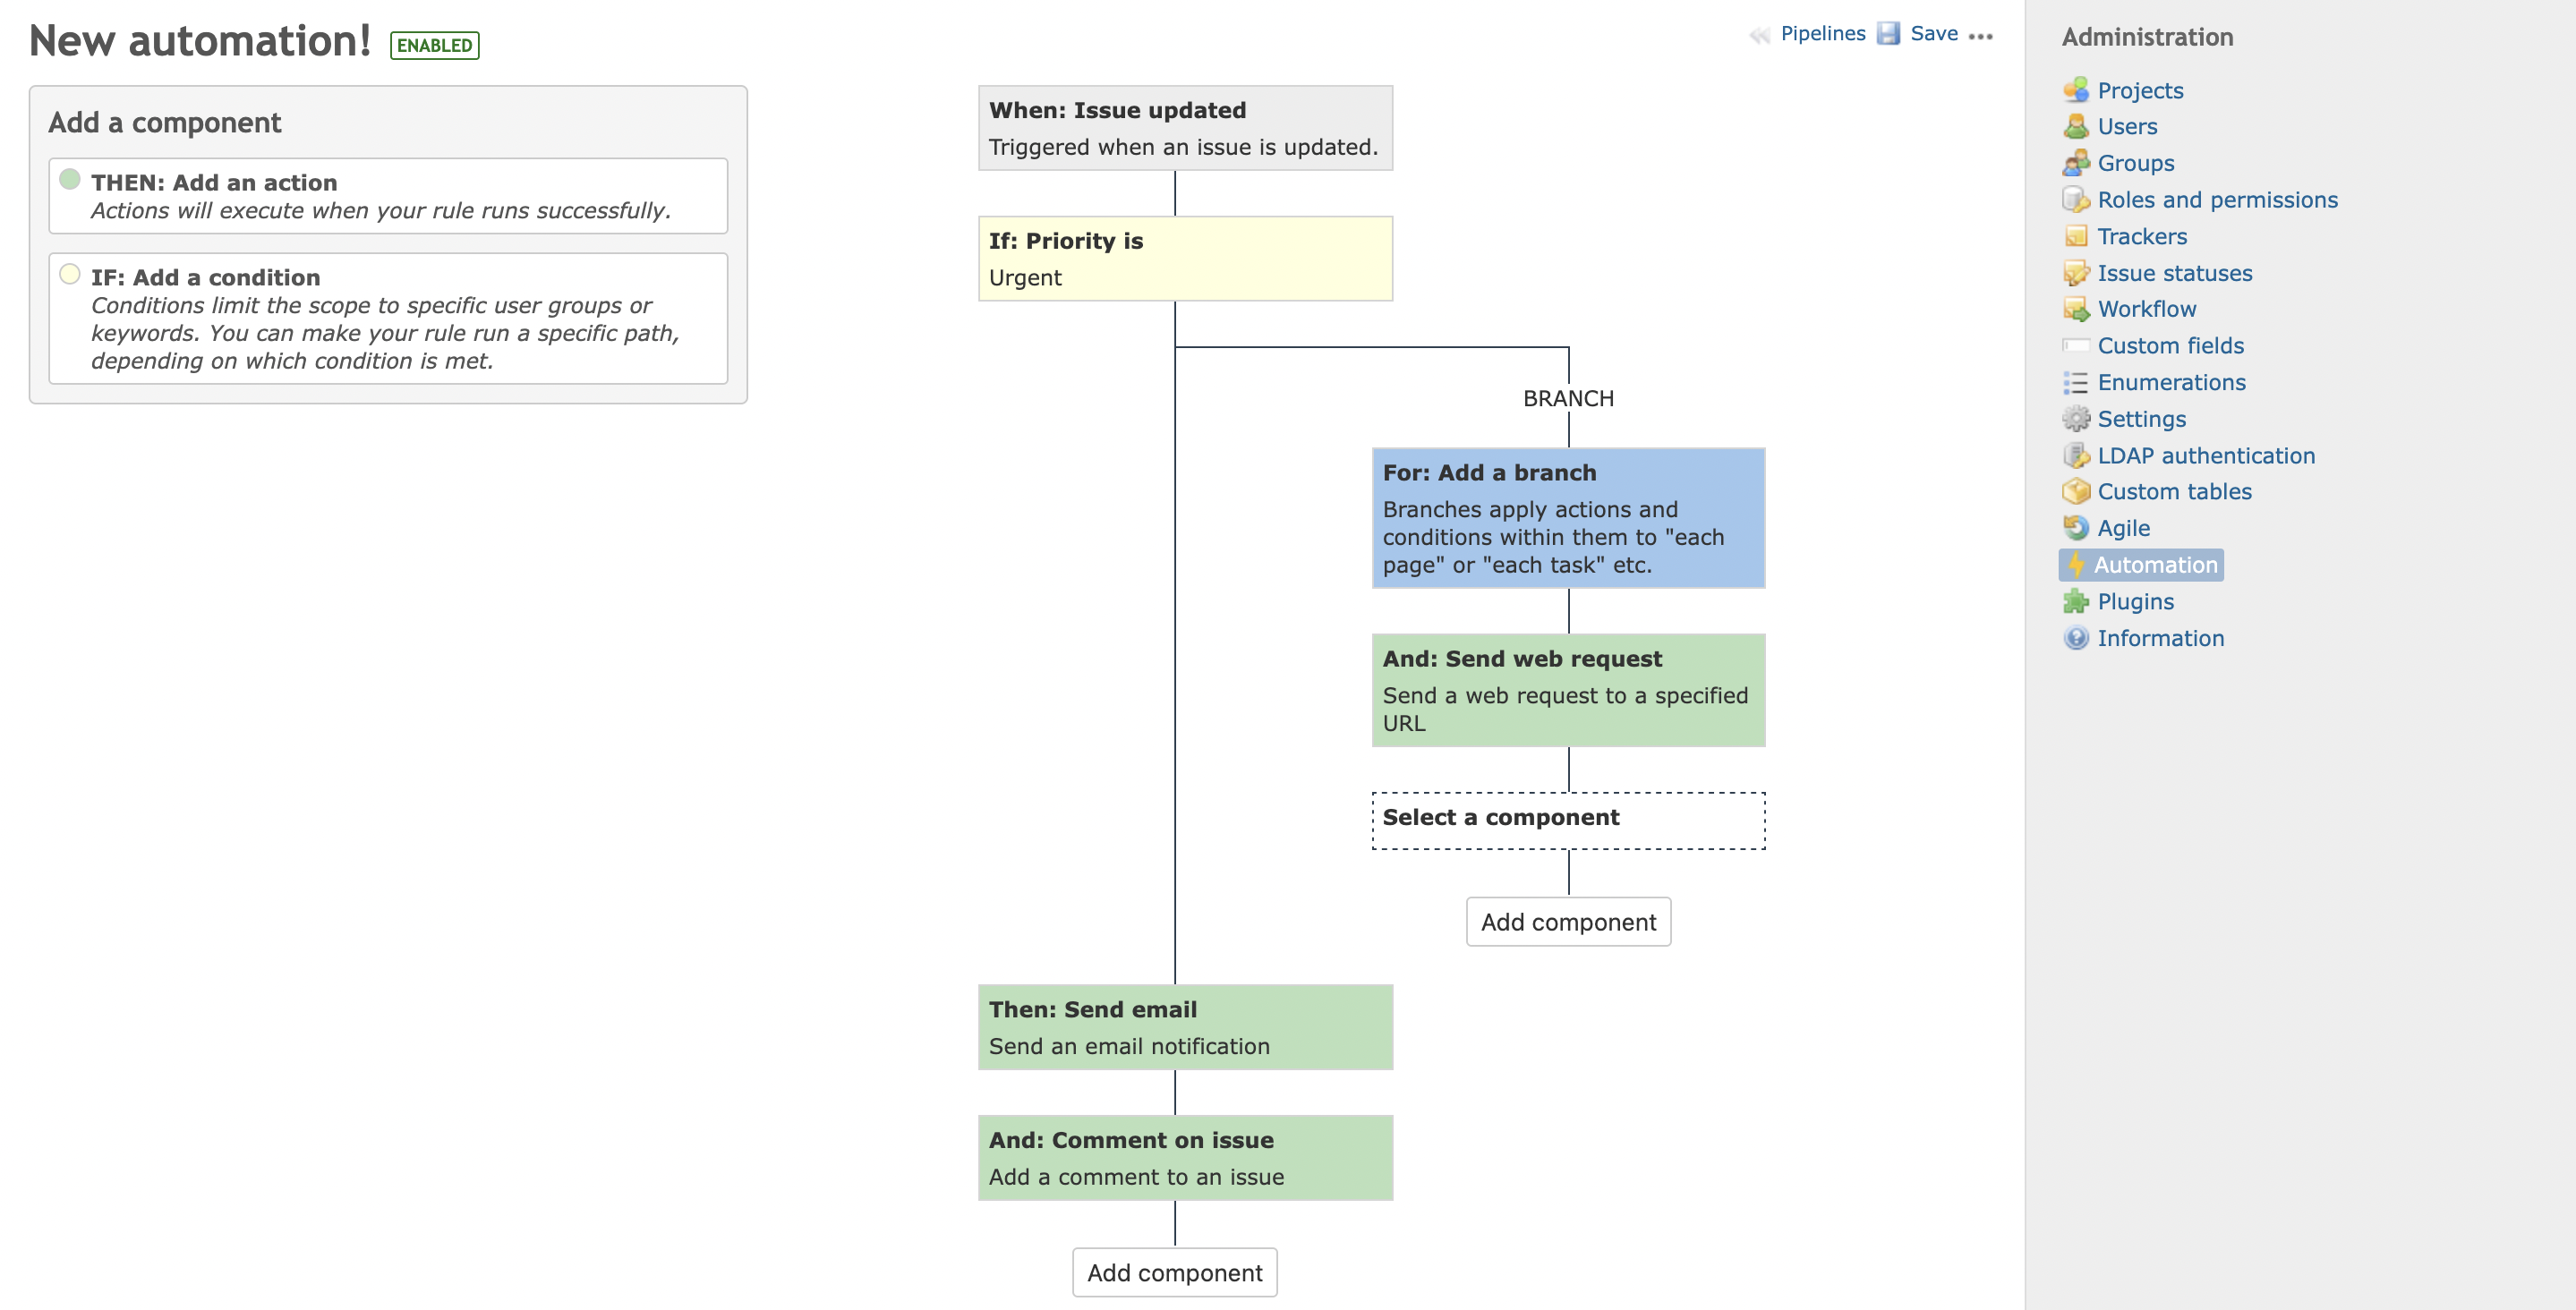
2. Creating Automations
2.1. Project Level Automations
Project-level automations apply only within a specific project.
How to create:
- Navigate to the target project.
- Go to Project Settings → Automations.
- Click “New” and configure the desired trigger(s), action(s), and condition(s).
- Save and enable automation
2.2. Global Level Automations
Global automations are managed via the “Administration” panel and can be applied to all or selected projects. Global automations can be created by administrators only.
- Go to Administration → Automations.
- Click “New” and define the workflow as needed.
- Save and enable automation.
3. Triggers
Automations are initiated by one or more triggers, which detect specific Redmine events.
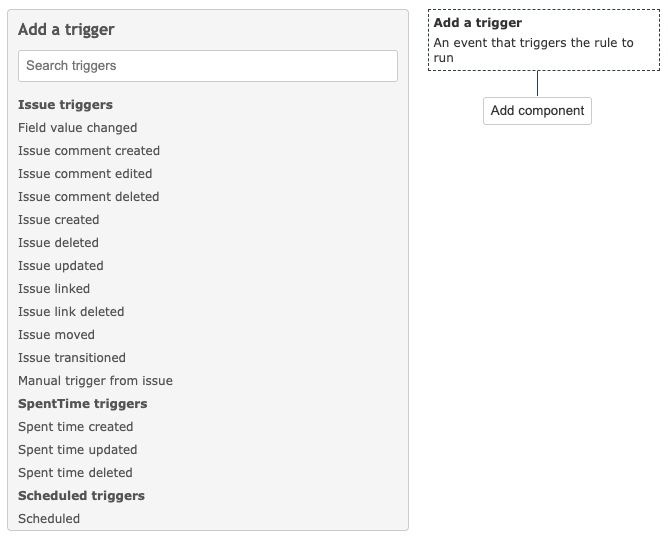
3.1. Issue Triggers
- Field value changed: Activated when a specific issue field (e.g., status, priority) changes.
- Issue comment created: Triggered when a new comment is added to an issue.
- Issue comment edited: Triggered when an existing comment is modified.
- Issue comment deleted: Triggered when a comment is removed from an issue.
- Issue created: Fired upon the creation of a new issue.
- Issue deleted: Activated when an issue is permanently deleted.
- Issue updated: Triggered for any update to issue properties (excluding only field changes if more granular conditions exist).
- Issue linked: Occurs when an issue is linked to another issue.
- Issue link deleted: Triggered when an issue link is removed.
- Issue moved: Fired when an issue is moved between projects or trackers.
- Issue transitioned: Activated on workflow transitions (e.g., status moved from “Open” to “In Progress”).
- Manual trigger from issue: User-initiated; available as a button or menu item on the issue view.
3.2. SpentTime Triggers
- Spent time created: Fired when a new time entry is logged.
- Spent time updated: Activated on modification of an existing time entry.
- Spent time deleted: Fired when a time entry is removed.
3.3. Scheduled Triggers
- Scheduled: Automations can be set to run on a defined schedule (e.g., daily, weekly).
4. Actions
Actions define what happens when an automation is triggered. Multiple actions may be combined in a single automation.
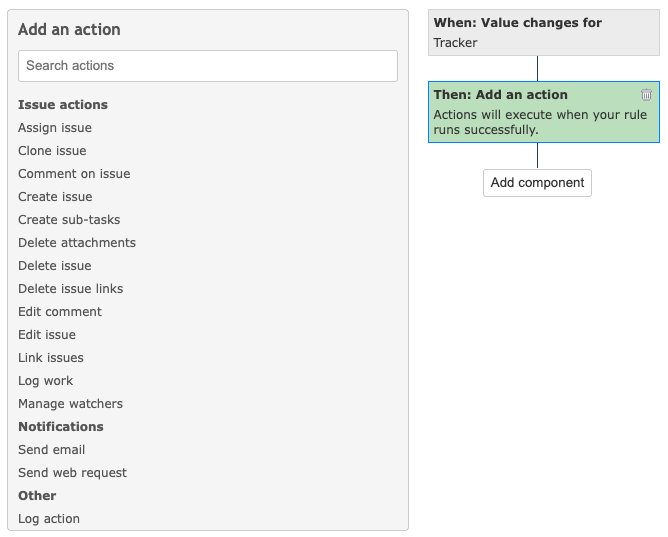
4.1. Issue Actions
- Assign issue: Changes the issue assignee.
- Clone issue: Duplicates the current issue (optionally to another project/tracker).
- Comment on issue: Adds a comment to the issue.
- Create issue: Generates a new issue, optionally with predefined fields and associations.
- Create sub-tasks: Creates one or more sub-tasks under the current issue.
- Delete attachments: Removes specified attachments from the issue.
- Delete issue: Permanently deletes the issue.
- Delete issue links: Removes specified links to other issues.
- Edit comment: Updates an existing comment.
- Edit issue: Modifies issue fields (status, priority, custom fields, etc.).
- Link issues: Establishes a relationship (link) with another issue.
- Log work: Adds a time entry (spent time) on the issue.
- Manage watchers: Adds or removes watchers (users notified of updates).
4.2. Notifications
- Send email: Dispatches a notification email to specified recipients.
- Send web request: Sends an HTTP request (e.g., webhook) to an external service.
4.3. Other
- Log action: Records a custom message to the automation log, useful for debugging and auditing.
5. Conditions
Conditions restrict when an automation executes.
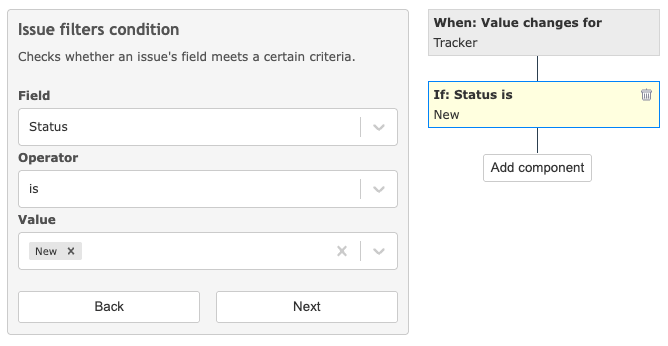
Examples:
- Issue field values (e.g., “priority = High”).
- Author or assignee (e.g., “author is in group X”).
- Time constraints (e.g., “created last week”).
- Project or tracker filters.
Conditions are combined using AND logic.
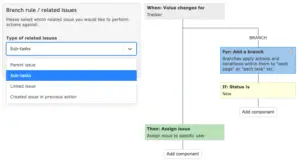
6. Branches

Branches introduce conditional paths (“if…then…else”) within automations, enabling more sophisticated workflows.
- Each branch evaluates its conditions and executes corresponding actions.
- Multiple branches can be defined per automation for complex scenarios.
7. Permissions
Access to automations (view, create, edit, delete, execute) is governed by Redmine’s role-based permission system.
- Assign automation permissions per role in Administration → Roles and permissions.
- Available permissions:
- View automation rules
- Manage automation rules
Ensure only authorized users can create or modify critical automation rules.
Any user with a role can trigger automation rules execution by default. Regular users don’t need any permissions to be assigned to they roles.
8. Automation Executions (Pipelines) and Logs
Pipelines are executions of the automation rules. Pipelines are accessible from project and global automation lists. To open pipelines select an automation rule and open the context menu, pipelines.
The list opened will show all the executions of the automation rule.
Column | Description |
Created | Timestamp when execution was run |
ID | ID of the pipeline |
Rule | Automation rule which was executed |
Branch | Automation branch executed |
Status | Status of the pipeline: success, failed, scheduled |
Author | User who triggered the execution |
Logs | Button, opens detailed pipeline log |
Clicking the Logs button will open detailed pipeline log.
Column | Description |
Created | Timestamp when node execution was done |
Rule | Automation rule which was executed |
Node | Node which was executed (trigger, action, condition, branch) |
Message | Message log, system or custom |